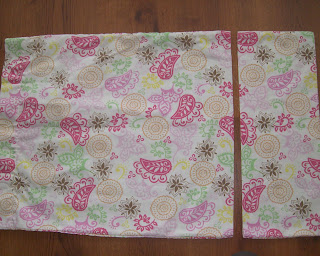
TJ Maxx is one of my favorite stores because I can always find great deals on quality products. This past weekend, I picked up a twin sheet set made of super-soft cotton for $14.99. However, rather than adorn a bed with it, I used it to adorn my 5 year-old (do you recognize it? I also made my pincushion out of it).
This flowy little dress is the pillowcase from the set, and was so simple to assemble (mainly because there was very little assembly). Also, it is nice because the pattern can be adjusted to fit many sizes of little girls.

To start, I cut the top (the sewn edge) off, so that the length would fit my daughter.
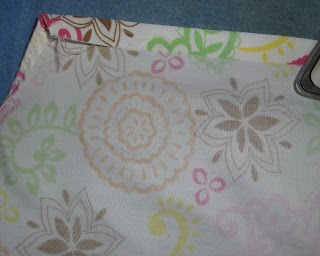
Then, along my newly cut edge, I notched out "j" shaped cutouts for the armholes. To make the two sides identical, I folded the fabric in half and cut both sides out at the same time.
Then, I ironed each armhole down twice to form a seam, and sewed.
Along the neckline (front and back), I folded over twice, and ironed down again. Except this time, I made the hemline bigger, so that I could insert 1/2" elastic.
My daughter typically wears a 5T in clothing, and I used about 8" for each side of the dress, but you might need more or less, depending on your child's size. Sliding the elastic through the channel was made easier by attaching a safety pin to the end.
Then, I tacked the elastic down on each end, which also closed the holes of the channel. (Am I making any sense??)
Now for my final step! I cut 2 strips of 8"x2" fabric that formed the straps. Once again, measure around your child's shoulder to determine how long yours should be.
Folding down each edge, I ironed it in place.
Then, I folded it in half, and stitched it closed. Please ignore my nasty ironing board. I must get a new cover for it this week. Or maybe I'll make this one...
I attached the straps to each corner of the neckline, and I am finished.
At this point I tried the dress on my skinny little girl, and it looked like a pillowcase with straps. Way too huge and billowy. It was a quick fix, though. I just turned it inside out, and starting from the armhole seam, I took in the sides a few inches, and it looked much better. Still flowy, but not like she was wearing a sack.


29 comments:
Cute Cute! I have tried the traditional pillowcase dress where you use the ribbons like drawstrings around the neckline and then tie them up on the shoulders. It always look dangerous to me and almost always looked too big. I love the way you did this pillowcase dress. I have a collection of too cute vintage pillowcases that are begging to be turned into cute dresses for my 6 year old. Thanks for the great tutorial!
Homegrown,
Thanks! I hope you make some; send me pics!
Also, I too had heard that the traditional pillowcase dress was a choking hazard. This way should eliminate that.
There you go again making me want to sew. geez! Seriously though you make it look so easy. This may be one I will have to try. First I have to get my husband to show me how to use the sewing machine.Is that pitiful or what?
I must try this!!! It looks adorable. Now I've got to find some cute pillowcases.
Thanks so much for sharing how you made this dress.
I just found your blog and LOVE it! I added you to my favs so I can check in daily! I have been wanting to sew sweet things for my daughter and you have some great ideas and they seem pretty easy which is good since I am just learning how to work the sewing machine. Your blog has both of my favorite hobbies, decorating and creating! Looking forward to more blogging! Your new blog fan! Julie
OOOOOO la la! I LOVE IT (as always...) Is Chloe getting the other case or are you making it for me, well not my actual body (ha ha!)but for little K... I have one word for you...ETSY!
Keep it coming sister. Since I am painting all the time I do all my other crafting vicariously through you!!!!!
This will be my next sewing project - I love it! I've added you to my faves list.
so cute, I love that fabric. I would use the sheets to make sheers under my heavy curtains.
Another reason to wish I had a girl! So cute and summery!
I LOVE this! Thanks for the great instructions. I'm printing them up for next week's project. Thanks again!
this is a fabulous idea, kristin! it's so cute!
I just used your tutorial to make a pillowcase dress for my three-year-old with a cute thrifted embroidered case. Fortunately, I got the set, because my six-year-old is clammoring for hers next! :)
Perfect instructions (and I am a total sewing beginner), thanks!
Hi! I just ran across your blog, which I love! I have 2 daughters who would LOVE these cute dresses! Im not a very good seamstress, but i think i could pull this off!
I feel like I've been living in a cave! Pillowcase dresses? Really? Summer is almost over and I'm just now finding out about these adorable and easy creations? I'd better get busy and sew.
oh yay.
summer is coming up over here and i am about to go through the linen cupboard!
love this.
Love this tutorial. The traditional pillowcase dresses don't lay nicely like this. I like how you used two separate pieces of elastic. Thanks.
Very Very cute! I love it! Martha
I have seen directions for a pillowcase dress all over the web...but yours by far seem to be the easiest. Thanks so much - I'll try it this weekend :)
Love it! Espeically how you made the dress slimmer! Do you mind if I link to this post? I'd love to share the "safe version" of the pillowcase dress!
Hi! I came across your blog and LOVE it. However I tried to make the pillowcase dress tonight and it came out ok, but I had a TERRIBLE time doing the arm holes. I just couldn't get it folded down and sewn right. Am I doing something wrong? It kept folding on itself and looking bunched up. Could you provide me some advice? You can email me at kmcfadden@radford.edu if you can help. I would appreciate it sooo much!
Thank you for sharing! You make it look so easy and fun!
How do you know if sheets are a good choice or not? What do you look for to know they are good?
thank you....I used it as my very first sewing project!
http://mysillybeanz.blogspot.com/2009/05/my-first-pilowcase-dress.html
I love your pattern! I've made two dresses for my daughter today, but I did change up the straps a little. She's 9 & very active and I was concerned they wouldn't hold (even with back stitching).... SO, I sewed the straps in before I put the elastic in, while I was sewing the pocket for the elastic. Then, I topstitched the elastic pocket so they've have more than one connection point.
I think it'll hold, and it looks a little nicer, too.
I used your pattern to make a shirt and a dress for my daughter!! :) Thanks for sharing!!
THANK YOU! THANK YOU! THANK YOU! Your tutorial was PERFECT! I have been wanting to sew for my daughter, but have never felt good enough to do it.... your tutorial gave me the confidence.....THANKS again!
Such a pretty but simple design Makes me wish for a daughter to make for.
With your easy directions, I was able to make a pillowcase dress in about an hour.
My daughter (8) dug through my scrap stash and picked a great retro print from the 1960's. We finished the hem with large olive poms.
She loves it and the dress looks great! Thanks for posting your tutorial.
Wow really pretty dress, never tough you could make a dress from pillowcase. I will try this at home for my daughter, I bet she's gonna love it. Thanks for sharing this one.
___
Gratitude is the sign of noble souls. - Aesop
San Francisco SEO|Seattle SEO|Seattle Real Estate
Post a Comment